前回構築した k3s-master Node にworker Node を追加してクラスターを構築する
今回の環境
TL;DR
1. ブートメディアの作成
Raspberry Pi Imager のインストール
sudo apt install rpi-imager
UBUNTU SERVER 22.04 LTS, ストレージ を選択して書き込み開始

K3S_TOKEN の確認
cat /var/lib/rancher/k3s/server/node-token
mynodetoken
Cloud-init スクリプトを編鐘
  # /media/kali/system-boot/user-data
  ...

  # On first boot, set the (default) ubuntu user's password to "ubuntu" and
  # expire user passwords
  chpasswd:
    expire: true
    list:
    - ubuntu:ubuntu

+ system_info:
+   default_user:
+     sudo: ALL=(ALL) NOPASSWD:ALL

  ## Set the system's hostname. Please note that, unless you have a local DNS
  ## setup where the hostname is derived from DHCP requests (as with dnsmasq),
  ## setting the hostname here will not make the machine reachable by this name.
  ## You may also wish to install avahi-daemon (see the "packages:" key below)
  ## to make your machine reachable by the .local domain
- #hostname: ubuntu
+ hostname: k3s-{saber,lancer,archer,etc.}
+ locale: en_US.utf8
+ timezone: Asia/Tokyo

  ...

  ## Update apt database and upgrade packages on first boot
  #package_update: true
  #package_upgrade: true
+ package_reboot_if_required: true

  ## Install additional packages on first boot
- #packages:
- #- avahi-daemon
- #- rng-tools
- #- python3-gpiozero
- #- [python3-serial, 3.5-1]
+ packages:
+ - avahi-daemon
+ - linux-modules-extra-raspi

  ...

  ## Run arbitrary commands at rc.local like time
- #runcmd:
- #- [ ls, -l, / ]
- #- [ sh, -xc, "echo $(date) ': hello world!'" ]
- #- [ wget, "http://ubuntu.com", -O, /run/mydir/index.html ]
+ runcmd:
+ - export K3S_KUBECONFIG_MODE=644
+ - export K3S_URL=https://k3s-master.local:6443
+ - export K3S_TOKEN=${mynodetoken}
+ - 'curl -sfL https://get.k3s.io | sh -'
2. Raspberry Pi 起動
ブートメディアを Raspberry Pi に挿して電源を入れる
珈琲を淹れて待つ
3. 疎通確認
kubectl
kubectl get node
NAME             STATUS   ROLES                  AGE    VERSION
k3s-master       Ready    control-plane,master   34d    v1.23.8+k3s2
k3s-saber        Ready    worker                 128m   v1.24.3+k3s1
k3s-lancer       Ready    worker                 125m   v1.24.3+k3s1
k3s-archer       Ready    worker                 125m   v1.24.3+k3s1
Dashboard
  # dashboard-adminuser.yaml
+ apiVersion: v1
+ kind: ServiceAccount
+ metadata:
+   name: admin-user
+   namespace: kubernetes-dashboard
  # dashboard-adminuser-role.yaml
+ apiVersion: rbac.authorization.k8s.io/v1
+ kind: ClusterRoleBinding
+ metadata:
+   name: admin-user
+ roleRef:
+   apiGroup: rbac.authorization.k8s.io
+   kind: ClusterRole
+   name: cluster-admin
+ subjects:
+ - kind: ServiceAccount
+   name: admin-user
+   namespace: kubernetes-dashboard
export GITHUB_URL=https://github.com/kubernetes/dashboard/releases
export VERSION_KUBE_DASHBOARD=$(curl -w '%{url_effective}' -I -L -s -S ${GITHUB_URL}/latest -o /dev/null | sed -e 's|.*/||')
kubectl apply -f https://raw.githubusercontent.com/kubernetes/dashboard/${VERSION_KUBE_DASHBOARD}/aio/deploy/recommended.yaml -f dashboard-adminuser.yaml -f dashboard-adminuser-role.yaml
namespace/kubernetes-dashboard created
serviceaccount/kubernetes-dashboard created
service/kubernetes-dashboard created
secret/kubernetes-dashboard-certs created
secret/kubernetes-dashboard-csrf created
secret/kubernetes-dashboard-key-holder created
configmap/kubernetes-dashboard-settings created
role.rbac.authorization.k8s.io/kubernetes-dashboard created
clusterrole.rbac.authorization.k8s.io/kubernetes-dashboard created
rolebinding.rbac.authorization.k8s.io/kubernetes-dashboard created
clusterrolebinding.rbac.authorization.k8s.io/kubernetes-dashboard created
deployment.apps/kubernetes-dashboard created
service/dashboard-metrics-scraper created
deployment.apps/dashboard-metrics-scraper created
serviceaccount/admin-user created
clusterrolebinding.rbac.authorization.k8s.io/admin-user created
admin-user token の確認
kubectl -n kubernetes-dashboard create token admin-user
myadminusertoken
kubectl proxy
Starting to serve on 127.0.0.1:8001
サインイン
open http://localhost:8001/api/v1/namespaces/kubernetes-dashboard/services/https:kubernetes-dashboard:/proxy/

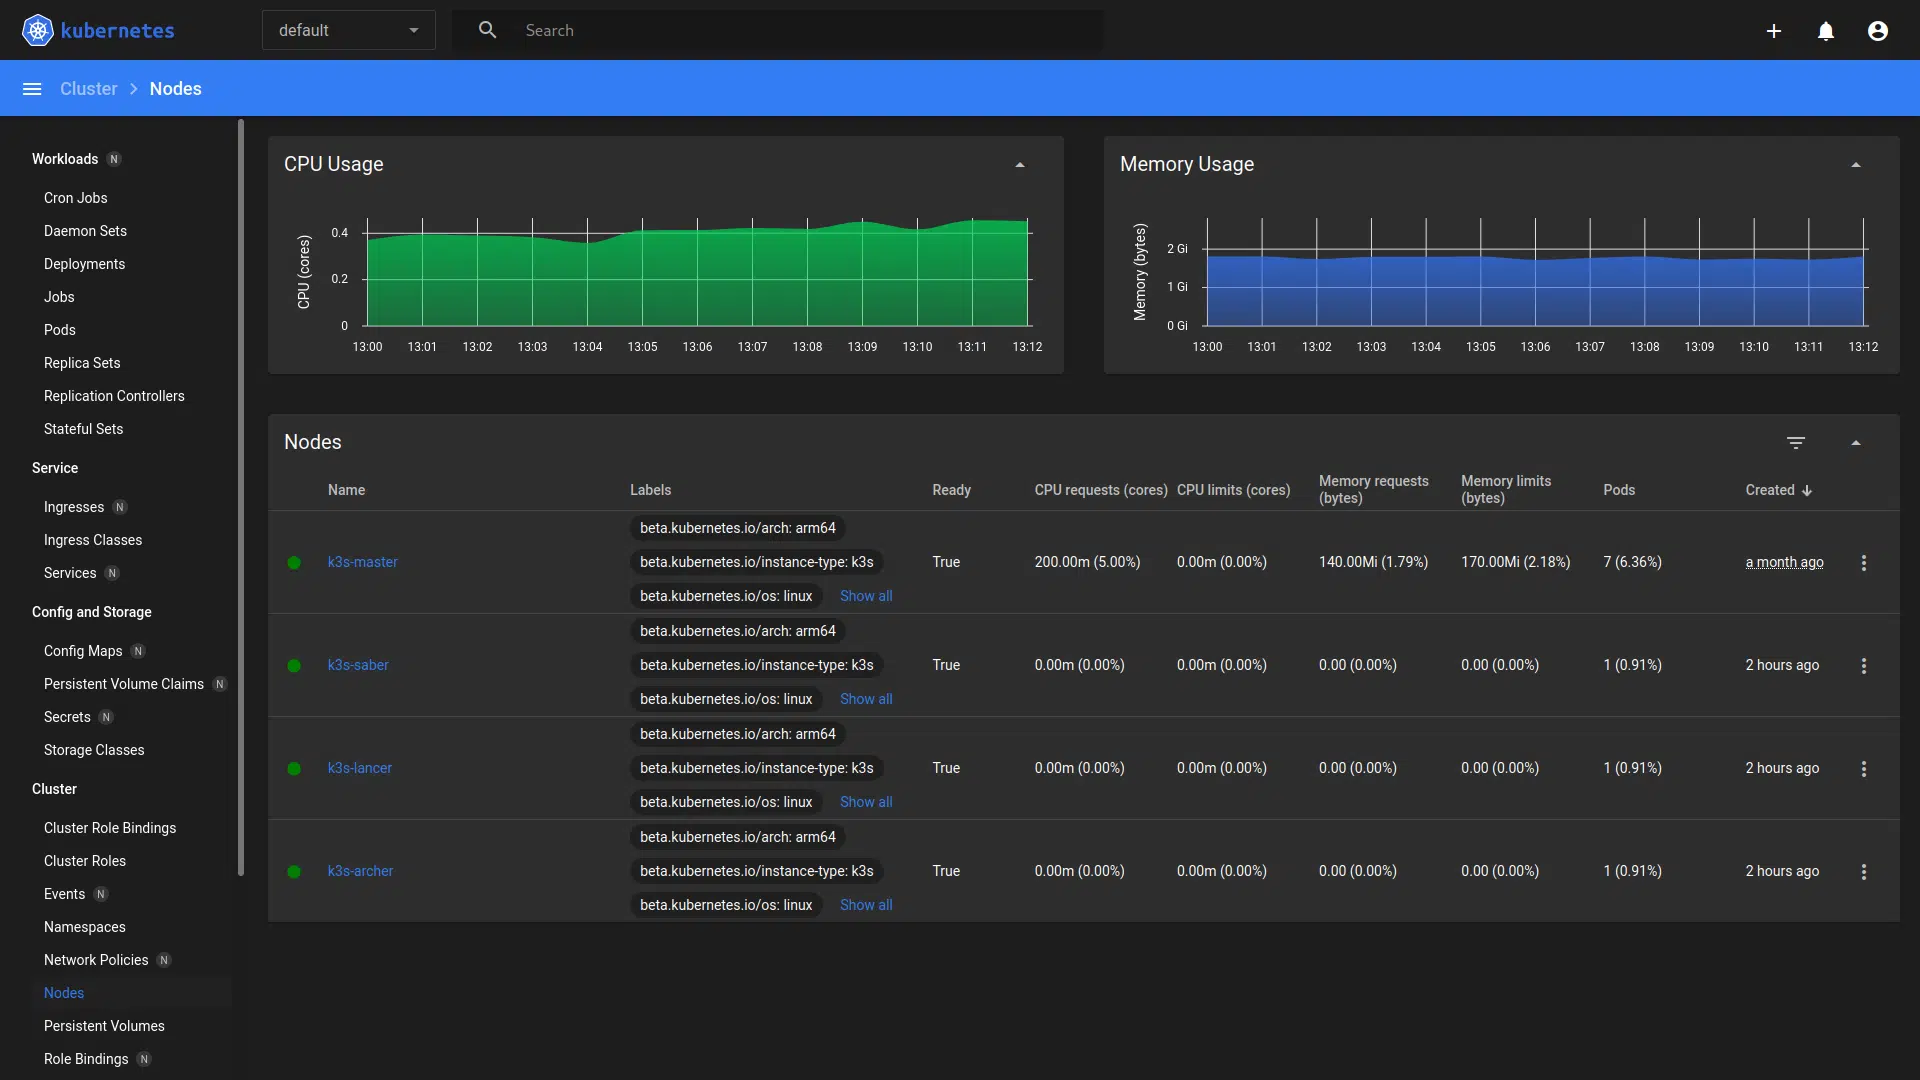
Cluster / Nodes

